Friday, October 11, 2013

Dining room chair makeover

Once upon a time, long, long ago, my lovely in-laws gave us a small dining room table and chair set.  It was perfect for our apartment, but when we moved into our house, it looked a little...well, little.

Just moved in


Off to Goodwill.  Farewell, tiny table and uncomfy chairs.


One day, World Market had one of their "this is the last one, please take it away from here" sales, and I found a perfect replacement table.
Even with cushions, these uncomfy chairs' days were numbered

But then, the hunt was on for new chairs.  Every single one I loved was too expensive for my tiny budget, so the hunt took a few frustrating months.

In September (2012), I found a serious score on Craigslist.  6 Thonet chairs for $165 ($27.50 each).  The nicest older couple was selling them, and were originally listing 3, but threw in the other 3 for free because they were in some rough shape.   In July, I finally finished them.  Phew. (Yes, that was a rather lot of dinner at the coffee table).

Hello.

The chairs had obviously been refinished once before, and not in the most expert way.  The stain was a little goopy and streaked in spots, and most of the caned seats needed replacing.  But, underneath, I knew loveliness awaited.


Because they're older chairs, I figured it would be smarter (and easier to make sure all the bits would fit back together with minimal cursing) to refinish them one at a time.  This made the process feel really, really long, but worked out well in the end.

All in bits.

The wood was in pretty good shape, mostly.  For the inevitable places where time had taken its divots, Timber Mate wood filler worked BEAUTIFULLY.  And good old Elmer's wood glue and a clamp fixed the seams that had started to separate.

I stripped off the old finish with water based stripper (Motsenboker's Lift Off) and my trusty 5-in-one tool.  It worked great...in the warmer months.  Even with a space heater in my garage, the stripping took at least 3 times as long in the colder months than when it was warmer.  So, please heed the temperature warning on the back of whatever product you use!


After getting the big chunks off with the Lift Off, I sanded everything down with 150 grit sandpaper.  Then, I ran some tack cloth over everything to get all the little sanded bits off and the wood clean and ready for paint.

Next, I wiped some whitewash on with some clean shop rags, and let it dry.  Finally, one more round of 220 grit sandpaper to distress the whitewash, and then re-assembled everything.  Some of the screws didn't survive the removal process, and none of the cover buttons did, but those were easy enough to find replacements for.


When I was finished with all the wood parts, it was time to turn my attention to the seats.  While I actually am really good at re-caning, the original re-do left the holes and seats in such bad shape that caning will have to be left to an actual professional.  Someday, when we have a few extra dollars, I'll send them out.  For now, we need a place to sit and eat.


I'm not sure why I missed pictures of this process, but we fashioned some seats out of plywood, with the thickest batting we could find at the craft store.  I'm pretty sure it was something like this.  We used a jigsaw to cut the plywood to the shape of the seat, and scissors that gave their life for the cause to cut the batting.  We used spray adhesive to attach the foam to the plywood, then used pattern paper to make a custom pattern for the seat covers.  We (OK, really, my mom) sewed all of the seat covers in one marathon session using cheapy mattress ticking fabric, slid them over the batting, and secured them under the seats with a little painter's tape.  Then, we drove a few screws into the bottom of the seat, so it will be not too difficult to remove if someone spills and the ScotchGuard fails.
A view from below

Because this lifted the seat a little, we had to make sure we lifted the table as well (it has some leveling screws built into the legs, luckily).

It took a LONG time, but I'm so happy with the finished product, and the everyone is loving having a comfy place to sit for family dinners!


Wednesday, October 9, 2013

Washing Machine Repair...coming soon.

We moved into our house in 2008, and my parents very generously warmed it with a brand new HE Whirlpool front load washer and dryer.  Sadly, the washer started making a loud jet engine noise during the spin cycle about 2 years ago.  We called out the repairman, who spun the basket once, announced the bearing had gone bad and the whole drum needed to be replaced.  He charged me $130, and quoted $1050 to repair it.  That was about $250 more than the machine cost brand new.  So.

We found just the bearing and seals available online via Yellow Van Handyman, and set off to follow the repair instructions via YouTube.  And it worked OK, but we did something wrong when we put it all back together because something was thumping loudly.

After a few months, my parents rode in to the rescue again and bought us a replacement.

A replacement Whirlpool.

This one.

I think you can see where this is going.

18 months later, same song, different verse.  I KNEW the bearing had gone AGAIN.  And yet, I called the repairman again.  And paid $130 again, to be quoted more than the cost of a new machine for the repair.  And, of course, Whirlpool only warranties the machine for 12 months.  *outrage*eye twitch*

So.  I just put my order in at Yellow Van Handyman for another new bearing replacement.  Hopefully, I'll be able to use our lessons learned from the first repair on this second one, and help you if you're in my same, sad situation.


Monday, October 7, 2013

Ding Dong Doorbell

While we were de-rotting spiffing up the front door, I stumbled on probably the only thing I will ever be able to afford from Restoration Hardware.  That's right, a doorbell.  Hello, Lovey.

We started with this.


Clipped wires


At least it was easy to remove.

We only drilled a small hole for the wire when we installed the new trim.  


 We thought it would be fine, since our old doorbell plate looked like this.


Of course, we didn't know that the fancy doorbell would look like this.


Time to break out the trusty drill and Forstner Bits (they make a flat bottomed hole).


Then, because the plate is so wide, we had to make some adjustments to the trim.  Time for the old reliable chisel and hammer.


Re-attach the wires in the holes, and screw the doorbell plate on.  Carefully silicone around the seams, and enjoy a quick project actually done in less than a day!


Front Door Frame - Whew! Almost done!

Well, where were we...  Last time I checked in, I had a rotting front door frame.  Now I don't, but it wasn't as easy as it should have been (when is it ever?).


Here is where I will warn you that, if you have the means, go to your local home improvement store, buy a new door and frame (even if your door itself is fine, like mine was), and have them install it.  This was a not so fun project.

Then again, if you're like us, you don't have the means.  So you'll have to use your own muscle.

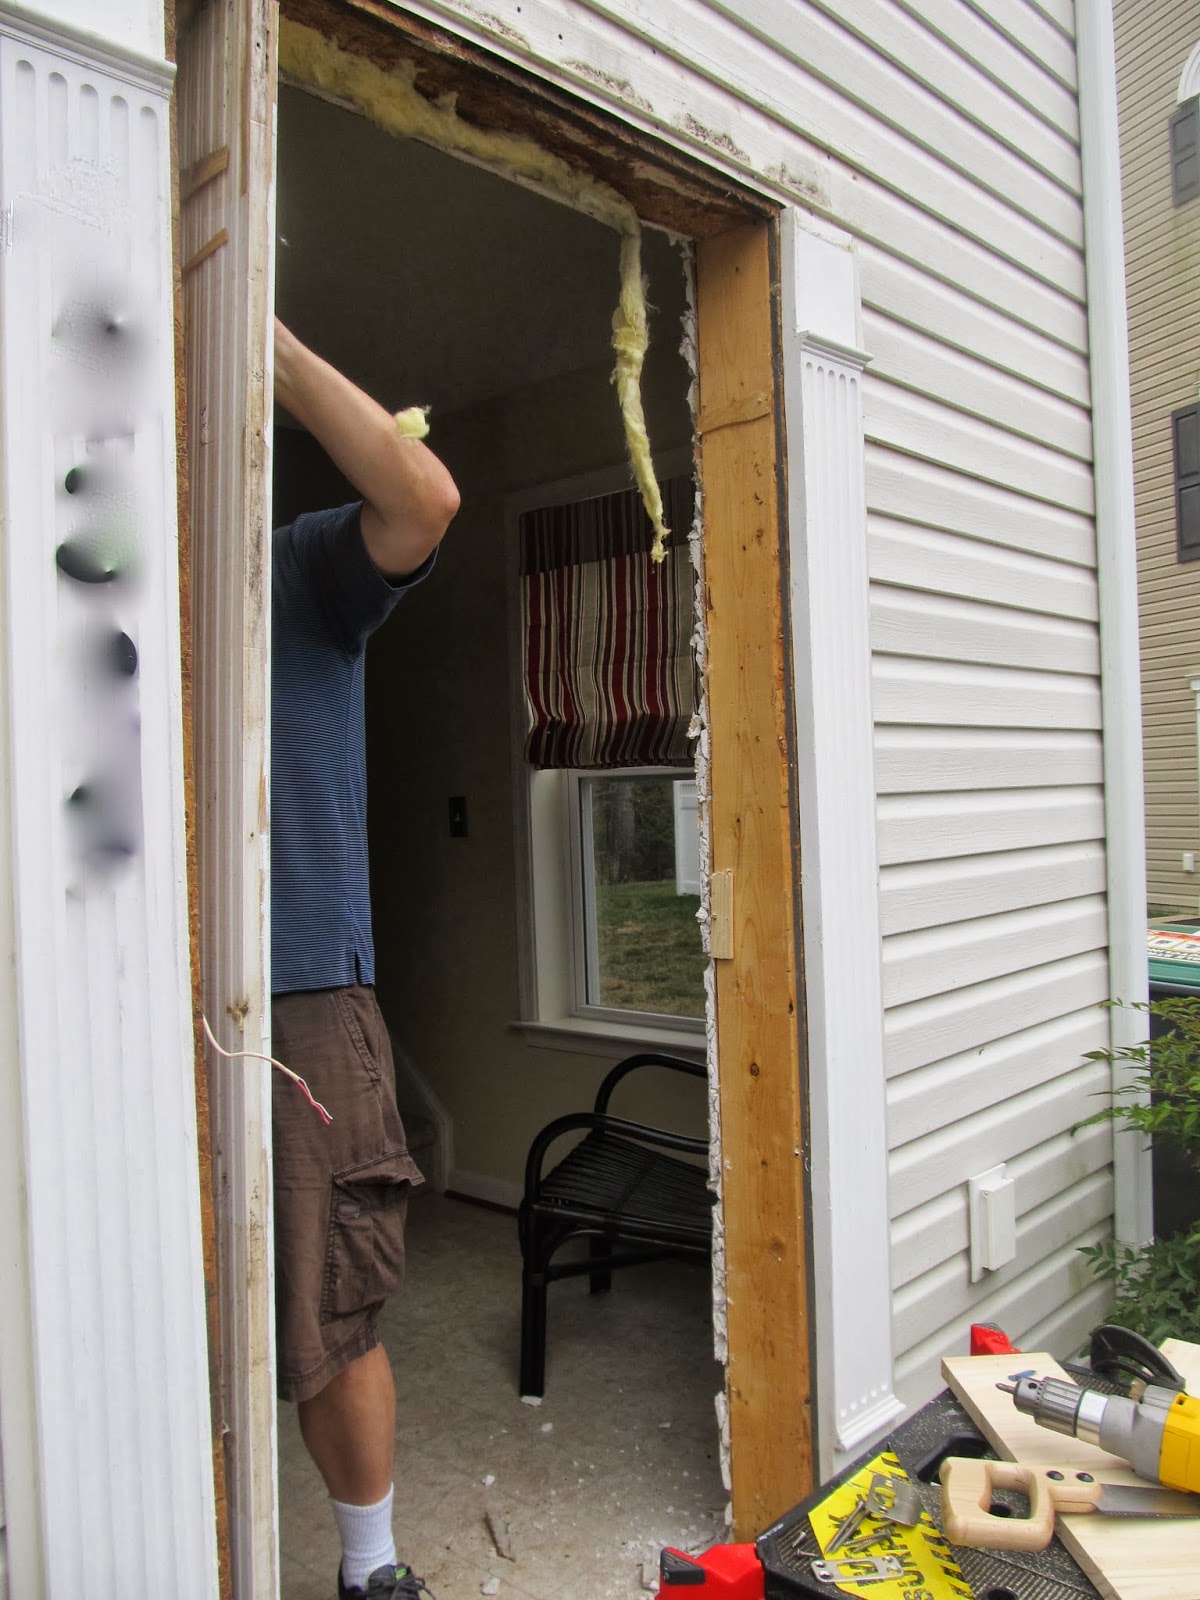
We started by gathering the supplies we knew we'd need.  Pry bar, hammer, and replacement trim pieces.


Take off your doorbell, and make sure to trim the wire ends so you don't incessantly ring it if the wires bump together (and make your dog think intruders are imminent)


Now the fun part - use the pry bar, hammer, leverage to help you remove the old trim.


Once we peeled off the top trim header, we knew our hypothesis about the water getting under there was correct.  At least we've got that sealed off now...


We intended to just patch the bottom door frame that had rotted out, but just the rot was more extensive than we saw initially.


So we took out the old door frame... and set off to find a new one.


Every home improvement store sells a standard door frame kit.  Of course, our door frame is not standard, by about 2.5 inches...


The most important part of installing the new door frame is to make sure it's square at the corners (use a speed square at the top corners), and at least as level as the rest of your house is.  Use shims (we needed 2 packs) to put the door frame where it needs to be.  To shim, slide 2 bits of the wood thin sides first, and push them toward each other until the door frame is where it needs to be.  Then, drive a screw through the door frame, shims, and into the side of the wall.  Then, trim off the shim ends.


The other thing you'll need to do, with a brand new door frame, is make your own room for hinges and strike plates.


Since there's a hug gap between our door frame, we needed to fill it with something to keep the air out (or in).  We found some spray foam specifically designed for door frames (if you use the other gap fillers, the foam can expand so much that it actually pushes the frame around).  Make sure you re-install the interior trim before filling with the foam, and ensure that the holes you drilled for the lock and door latch are protected, as well.


Once that puffed up (and after a LOT of wiping off excess foam), it was time to install trim piece part 1.


Trim a bit out for the wires.


Then, patchy trim piece 2.


WHEW.  

Squeeze silicone in the gaps and nails, smooth with your finger, and DONE.  Ish.  

I still need to paint the new trim to clean it up and make it look uniform.  But until next weekend...