I'm still working on getting enough supplies for this project, but I think you can see where this is going...
Plans include - gluing more halved TP rolls to a small container (top of a shoe box, maybe?) and having Kiddo help paint each tube the proper color.
I love a project the Kiddo can help get crafty with - I can't wait to show you the results!
Friday, November 22, 2013
Sunday, November 17, 2013
Half Finished House Tour: Upstairs Hall Before and After
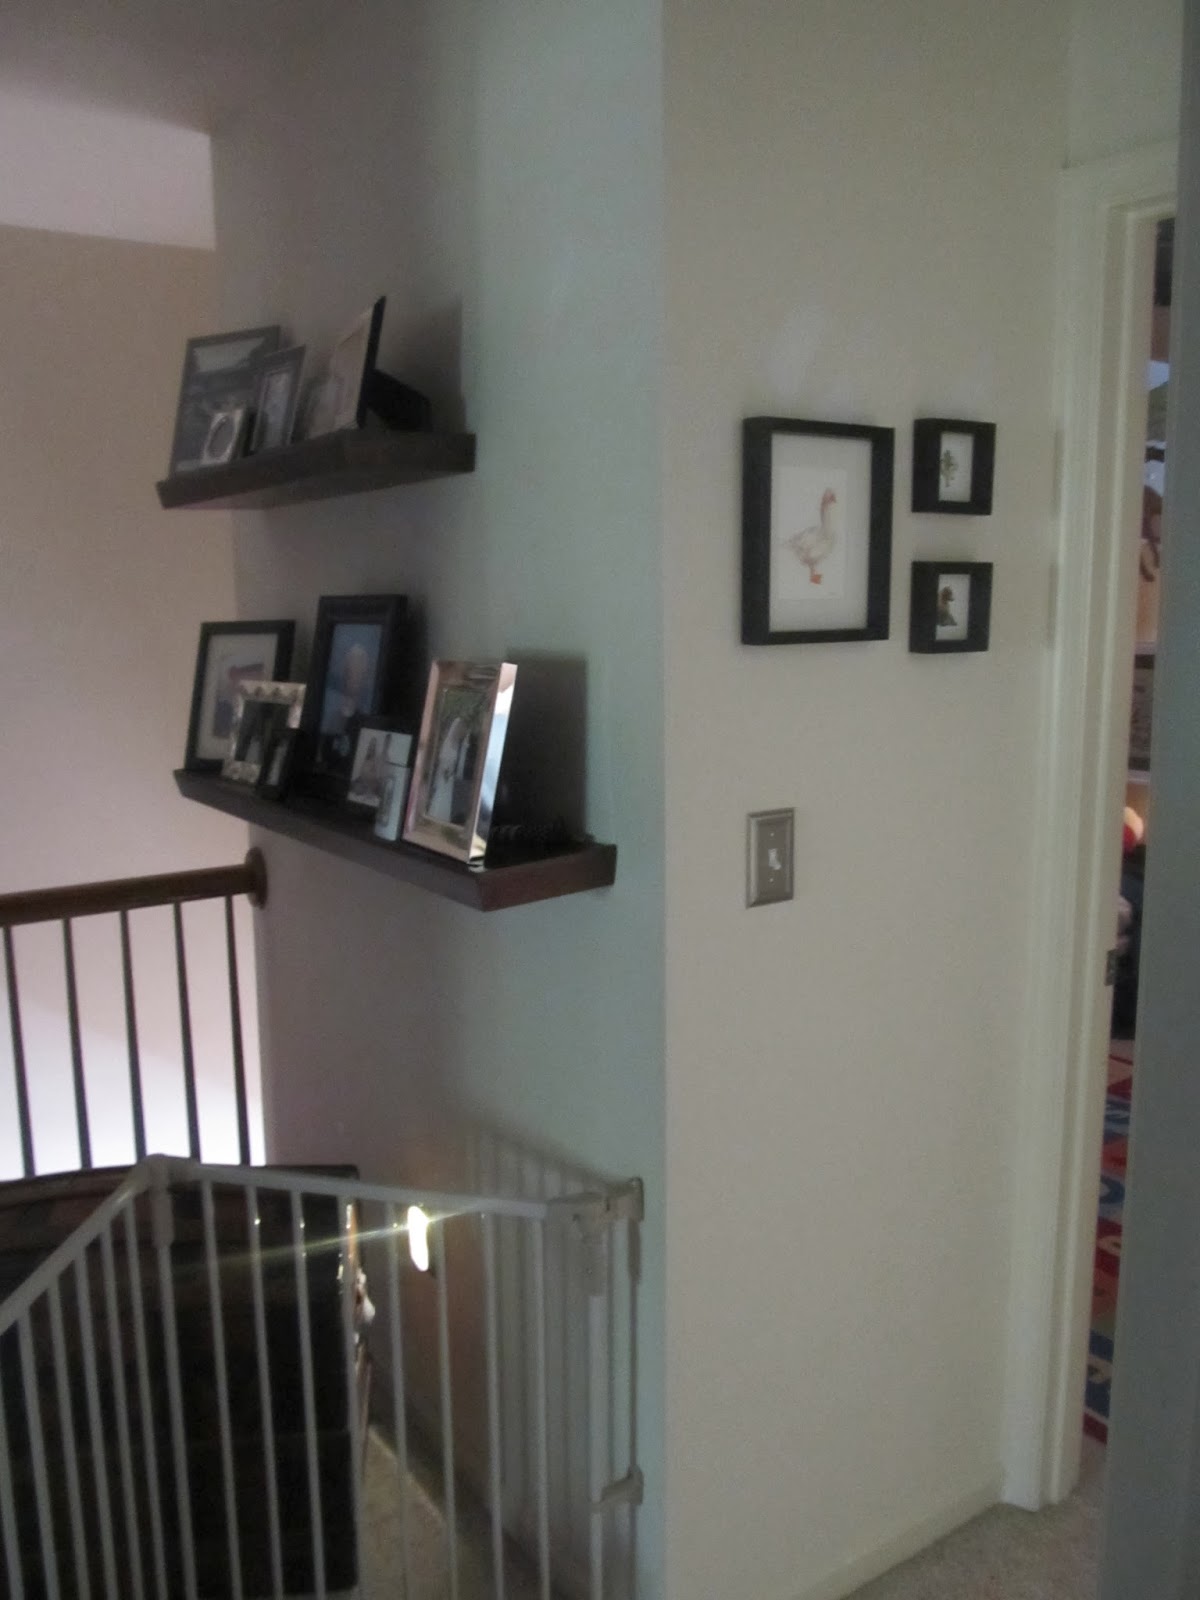
The third floor of our house is made up of 2 small bedrooms, the superhero bathroom, linen closet, and master bedroom suite, all connected by a small stairwell hallway.
It was one of the first "rooms" we attempted decorating. I threw some shelves up for pictures, and then the hallway didn't get touched for years, until it was time to add the longest baby gate imaginable. When I read (probably on pinterest?) a designer's advice to avoid neglecting hallways, I knew it was time to give the upstairs hallway a little love. After all, it's the first thing I see when I leave the cocoon of my room in the morning, might as well make it pretty.
Here's what we started with.
With the challenge of the high ceilings, this was the very last room I painted, because I was a little intimidated by the extra degree of difficulty. I was glad I didn't rush into painting, because it gave me time to get the color right on all the other (easier to paint) walls first. I finally mustered up my courage (and a much better color paint than I would have picked initially), and grabbed long poles and rollers and set to work. Of course, I slipped on the stairs as I finished painting and discovered just exactly where my tailbone is, so that was nice.
I wanted the hallway to have a little more purpose, too. It felt like a lot of wasted space, and I needed some room to display the Kiddo's growing art collection. Ikea's Deka curtain wires work great to let us clip and easily change out the art as it comes in. I also finally figured out a way to shorten the gate (relatively) safely by securing it to the bannister instead of the wall.
Our book collection is also getting out of control, especially the Kiddo's. The new space that this project opened up let me build a really simple bookshelf out of plywood and happy blue paint. I tossed some old throw pillows by the shelf, and added the heirloom Kiddo-sized rocking chair for cozy reading spot options.
Our collection of favorite family picture is getting similarly out of control, so I used the big empty tall walls of the stairwell to put up a gallery. We don't have family pictures anywhere else in the house, and I like that distinction between our personal and more public (party/visitor) spaces.
I'm having a really difficult time picking the just-right lighting options for this space. Anybody have some good ideas?
It was one of the first "rooms" we attempted decorating. I threw some shelves up for pictures, and then the hallway didn't get touched for years, until it was time to add the longest baby gate imaginable. When I read (probably on pinterest?) a designer's advice to avoid neglecting hallways, I knew it was time to give the upstairs hallway a little love. After all, it's the first thing I see when I leave the cocoon of my room in the morning, might as well make it pretty.
Here's what we started with.
![]() |
| View from Master Bedroom, Kiddo's room straight ahead. |
| From Left: Kiddo's room, Guest room, Superhero bathroom, linen closet, Master bedroom (not pictured). In front, massive baby/dog containment device. |
![]() |
| View from the bathroom. |
With the challenge of the high ceilings, this was the very last room I painted, because I was a little intimidated by the extra degree of difficulty. I was glad I didn't rush into painting, because it gave me time to get the color right on all the other (easier to paint) walls first. I finally mustered up my courage (and a much better color paint than I would have picked initially), and grabbed long poles and rollers and set to work. Of course, I slipped on the stairs as I finished painting and discovered just exactly where my tailbone is, so that was nice.
| Just add paint. |
| Middle wall close-up. |
I wanted the hallway to have a little more purpose, too. It felt like a lot of wasted space, and I needed some room to display the Kiddo's growing art collection. Ikea's Deka curtain wires work great to let us clip and easily change out the art as it comes in. I also finally figured out a way to shorten the gate (relatively) safely by securing it to the bannister instead of the wall.
Our book collection is also getting out of control, especially the Kiddo's. The new space that this project opened up let me build a really simple bookshelf out of plywood and happy blue paint. I tossed some old throw pillows by the shelf, and added the heirloom Kiddo-sized rocking chair for cozy reading spot options.
![]() |
| Gallery wall |
![]() |
| New view from the Guest room. |
I still have to do something about the decidedly unattractive ceiling here. I bought a kit to convert the recessed can light to something else...now I just need to find the perfect replacement. The boring flush mount light will need to get changed out to echo whatever we change the recessed to. And our builders neglected to paint the trim on the attic access panel and the yellowed nail hole fills are getting more noticeable, so that needs to be done, too.
I'm having a really difficult time picking the just-right lighting options for this space. Anybody have some good ideas?
Tuesday, November 5, 2013
Half Finished House Tour: Master Closet Makeover
When our house was being built, we had to choose between a master bathroom with no tub but a sizable closet, or a big soaker tub and a smaller closet. We went tub, but that left us with a closet that was way smaller than we had hoped for.
And of course, like everything else in the house, it was as basic-builder-grade outfitted as it gets.
The light was the first thing to go.
I really loved the Allen + Roth closet systems at Lowe's, but the price tag gave me pause. We looked into the Ikea closet organizers, but they all seemed to eat up more room than we had to spare.
So, I improvised. I grabbed a bunch ClosetMaid stackables from Target and tried to get the same look for a little less. I added shelves all around for extra storage, stained wooden closet rods and hung them at heights designed to maximize the vertical space I'd created, and switched out the hardware for a nicer finish.
It's a little hard to see in pictures, but I picked 3 different lavendery-purples, the darkest on the 2 walls with the closet organizers, the lightest on the ceiling, and the middle color on the bare walls.
I hung some hooks for belts, and my favorite family photo. I finished it off with a big mirror, and tossed in an ottoman that has a little storage in the seat (and that acts as an impromptu step stool so I can reach the top shelf).
All in all, it took about a weekend to get everything assembled and installed. I made sure to anchor each stacked unit to the wall with strong anchors, so they're nice and firmly attached. The only thing I would do differently next time is to consider the weight of the entire structure on the drawers I put on the bottom of the stack - those drawers close, but it takes more effort than I'd like. My husband's middle drawer set works much more smoothly. Otherwise, they've held up well, and we've really enjoyed the extra storage and organization!
And of course, like everything else in the house, it was as basic-builder-grade outfitted as it gets.
| What a mess |
The light was the first thing to go.
I really loved the Allen + Roth closet systems at Lowe's, but the price tag gave me pause. We looked into the Ikea closet organizers, but they all seemed to eat up more room than we had to spare.
So, I improvised. I grabbed a bunch ClosetMaid stackables from Target and tried to get the same look for a little less. I added shelves all around for extra storage, stained wooden closet rods and hung them at heights designed to maximize the vertical space I'd created, and switched out the hardware for a nicer finish.
It's a little hard to see in pictures, but I picked 3 different lavendery-purples, the darkest on the 2 walls with the closet organizers, the lightest on the ceiling, and the middle color on the bare walls.
I hung some hooks for belts, and my favorite family photo. I finished it off with a big mirror, and tossed in an ottoman that has a little storage in the seat (and that acts as an impromptu step stool so I can reach the top shelf).
All in all, it took about a weekend to get everything assembled and installed. I made sure to anchor each stacked unit to the wall with strong anchors, so they're nice and firmly attached. The only thing I would do differently next time is to consider the weight of the entire structure on the drawers I put on the bottom of the stack - those drawers close, but it takes more effort than I'd like. My husband's middle drawer set works much more smoothly. Otherwise, they've held up well, and we've really enjoyed the extra storage and organization!
Monday, November 4, 2013
Baseball Bed and Built In Night Light
A while back, when the kiddo moved from crib to big bed, we had a decision to make - cheapy toddler bed, or big bucks until-you-leave-this-house. I'm not a big fan of paying for the same thing twice, so we splashed out a little on a fancy Essentia mattress, and made sure we got it in twin XL - narrow enough to fit in his room, long enough to fit his growing height.
This made finding a bed a little tricky. So we packed up and trundled to Ikea for some ideas.
I liked the kids Malm bed; simple, low, inexpensive. I was even more excited when we found one in the as-is section for about half price. Only problem, the sides were twin length; not going to work on our extra long mattress.
And this is where Ikea is kind of magical - I marched over to the customer service/spare parts counter, and asked if they had any Malm queen side rails they could sell me separately. They did, confirmed that they used the same mounting hardware so I wouldn't even have to rig anything fancy to attach them, and charged me all of 20 bucks. Problem solved!
Except. The as is head and footboard I found were dark black/brown. The only side rails they had for the queen bed were white. So I had some painting to do. Which was fine, since I had planned on baseball-ing the headboard anyway.
I sanded for-e-ver, primered, and coated the whole bed in some leftover trim paint I had in the garage. If I had the shiny-surface primer I used to paint our kitchen cabinets, I would have used that instead of my sanding marathon. It took 2 coats to get the coverage nice and even, and then I freehanded some baseball stitching on the headboard. It didn't turn out as well as I'd hoped, but it delighted the kiddo, so I called it good.
My kiddo has always had a tough time with the dark, and deemed every nightlight "too dark." So, while we were still at Ikea, I grabbed the Ledberg light strip, since I knew the led lights wouldn't get too hot for curious fingers, and wouldn't skyrocket my electric bill by being on all night. I screwed the holder clips to the back of the headboard, and now I don't hear any more complaints about the light being too dim.
| Lights off... |
| Lights on... |
![]() |
| From the side |
When we moved his bed into the closet nook, there was a tiny space on the side that made me sure everything would get lost down in the gap. Luckily, I had a small floating shelf hanging around from another project that fit the space perfectly. Now he has a little spot for water, extra stuffies, or small toys he asks to bring to bed with him.
Sources:
Malm Bed, Ledberg LED light - Ikea
Baseball Bat Holder - Custom
Quilt, Small Ticket Pillow - Land of Nod (on SUPER clearance)
Large Baseball Pillow - Pottery Barn Kids
Owl Hooks (leftover from a closet-reading nook transition that didn't work) - Anthropologie
Floating Shelf - Target
Superhero ABC's, DONE!
A few months ago, I got started on my kiddo's superhero bathroom. I am happy to say, I am FINALLY finished with the last piece of the super-decor.
As I was stitching, my son kept a tight watch on my progress.
"Mommy, who is C?"
"Cyclops."
"Oh. That is disappointing for Captain America."
Repeat for S.
So, I whipped up a stand alone Superman and Cap. I just popped them in a frame I had laying around, and you can see the difference between a stretched mounting and a lazy one...
TA-DA.
I took it down to our local craft store, and grabbed a stock frame. I asked them to cut a custom mat and they mounted the cross stitch on foam. Of course, they got the order of the mats wrong, so the blues of the mat and the bathroom wall clash a little (also, that Love, Mom business at the bottom was supposed to be covered by the mat...) but Kiddo said he liked it, so I'm not going to worry too much.
![]() |
| extreme close up. |
As I was stitching, my son kept a tight watch on my progress.
"Mommy, who is C?"
"Cyclops."
"Oh. That is disappointing for Captain America."
Repeat for S.
So, I whipped up a stand alone Superman and Cap. I just popped them in a frame I had laying around, and you can see the difference between a stretched mounting and a lazy one...
Since they were headed for a steamy bathroom, before I put either of these pieces in frames, I made sure to spray them down with a few coats of Scotch Guard. I also briefly considered running a little silicone around the frames' edges to seal any moisture out, but I think that might be overkill.
These guys took a while (I averaged about 1 letter or hero per day), but so very do-able. Head over to the Wee Little Stitches Etsy shop for a pattern of your own.
Monday, October 28, 2013
Trash to Treasure - Egg Carton Paint Palette
I've mentioned before that my family (lovingly) teases me for having a million projects going at once. But this weekend, I had NOTHING. I finished my Superhero ABC cross stitch (awaiting framing) for my son's bathroom, the washer was working great (knock wood), and I was planning on taking a break and doing nothing more ambitious than carving up some jack o' lanterns.
But of course, I get my project-doing nature from somewhere *cough*parents*cough*, which revealed itself as my dad regarded an empty plastic egg carton.
"There must be something we can do with this piece of engineering," he said.
He grabbed a scrap of plywood from the garage...
Some epoxy laying around from a (failed) attempt to fix a broken Buzz Lightyear hip...
Added the egg carton...
Pressed them together, let set for 15 minutes...
And let one very happy grandson go to town, with plenty of spots to mix new paint colors to his heart's content.
Front Loader Fix-it - Replacing a washing machine bearing
Finally, as promised, a how-to on washing machine bearing replacement.
If your washer sounds like a train during the spin cycle, your bearing is probably toast, and you'll need to replace it. Every machine is set up slightly differently, but here's a handy step by step on how to replace it. With bonus TIP commentary because this is the SECOND time we've had a Whirlpool front loading washer's bearing fail.*
I'm not going to kid y'all, it's a lot of work. But, based on the quote from the repair man, it's also a LOT of money saving. $80 for new bearings and seal v. $1000+ for a whole new washer drum (that didn't need replacing, the guys Whirlpool contracts with wants to replace the whole assembly instead of just the broken piece).
Before you get started, gather your tools. I needed:
- Screwdriver (invest in a set with multiple size and shape bits - so, so worth it)
- Pliers
- Socket wrench
- Towels. A bunch. Not your nicest.
- Chisel/Large screwdriver
- Mallet
- New seal and bearings
- Sledge/Heavy duty hammer
- Camera
- Flashlight
- If you care about your floors getting dirty or ruined, a tarp to protect the workspace.
- Bravery, confidence, and a sense that you can't make it MORE broken, so it's worth a try...
Also helpful: a labeled place to put all the different screws holding your machine together:

Step 1: Shut off your water at the washer outlet, unplug your machine, unhook your hoses from the wall. This can get pretty wet if you're not careful to hold the hoses upright, so make sure you have a bunch of towels handy. Move your machine somewhere you can work freely and has a lot of room for all the parts you're about to take out. Take out your dispenser tray (mine has a little push button release, and pulls right out).
Step 2: Remove the top panel. In mine, the 3 screws along the back are all that hold it down. Once they're out, lift up and pull the top off.
| 3 screws at the top |
| Top removed. |
Step 3: Remove all your hoses from the back, and then remove the back panel. Some of the screws on mine were longer than others; make sure you mark where any oddballs you have go.
![]() |
| Undo the hoses |
![]() |
| Back panel off. |
Step 4: Remove the front bottom panel. This will give you access to the lower front tub weights, front shocks, and and the lower drain hose.
Step 5: Unhook your detergent dispenser from the machine front, and the hoses that feed into the tub. My dispenser had 3 screws that held it on, and a little clip on the top.
Step 6: Now, you should be able to unhook the top rear metal bar on the machine and place it to the side. You may need to unclip some wire connectors first, though. Make sure you take plenty of pictures so you know where they re-hook.
Step 7: Time to undo the motor. First, you'll need to remove the belt. Just spin the big silver wheel at the back, it it'll spin right off. Note where your wires (especially the green ground wire) attach, and remove them. Our motor was held on with one bolt and 2 placement arms, but your setup might be different. Once it's off, put it somewhere safe.
TIP: Take lots of pictures of this. You might not use them, but you'll be happy to have them.
Step 8: Remove the front seal. There's a little springy seal clip at the very front opening (where your door rests) that will peel off with a screwdriver really easily. Take care not to rip the seal itself as you remove it.
Then, after you peel the seal front back, there's a second clamp that holds the seal on the tub. On mine, it had one screw to untighten, and off it came.
Step 9: Take off the tub weights using your socket wrench. On my machine, there was one weight at the back (brownish), and 2 on the front (grey) - one on top, one below. Removing the seal in front of the tub made getting to the bolts on the front much easier.
TIP: Don't skip this step. It seems like a pain, but it is infinitely easier (and you are less likely to break something) to lift the tub where you need it with as little weight on as possible.
| Rear weight coming off |
| Lower front weight, hiding under the seal |
Step 10: Unhook any other wires and hoses from the tub (the lower hose, especially, needs a towel or 5 underneath it when you unhook it). Take lots of pictures, again, so you know you've set it back up correctly.
Step 11: Unhook the shocks. On this machine, they were locked in with little pressure clips, which we had to depress with a tiny screwdriver, twist and remove. In the first one, the shocks were held on by screws, so your machine may be slightly different. Make the shocks as small as they can go, and fold them off to the side so they don't get bonked.
TIP: This is where removing the weights first is helpful. The first time, we didn't remove the weights, and we're pretty sure it bent one of the shocks, resulting in a really loud thumping that made us replace the whole machine after a few months. Just...be really, really careful with these parts as you detach and reattach them.
Step 12: Now the only thing holding your tub on should be 2 springs. Lift the tub up and out, and set it in a good space to work on it.
| Tub and drum removed and ready to fix |
| An empty washing machine |
Step 13: Unhook the rear wheel. Use a hammer handle to keep the wheel from turning with the socket.
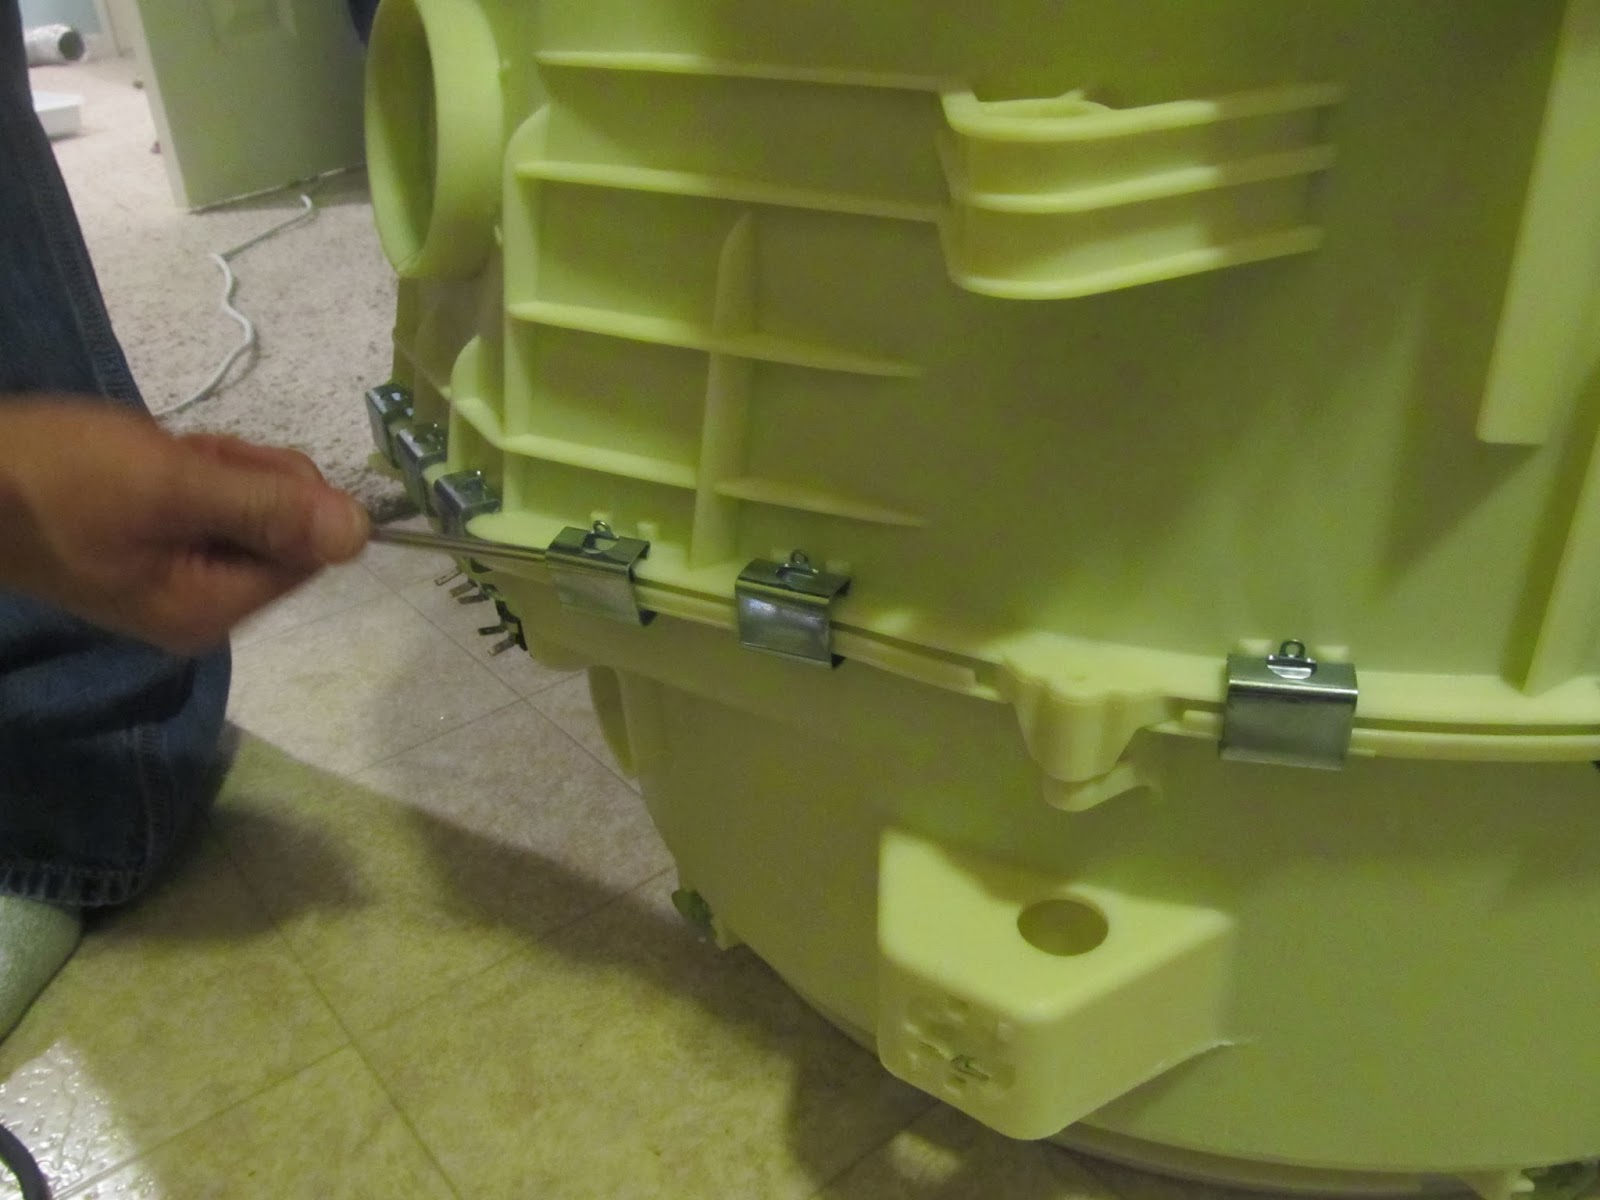
Step 14: Unhook the clips holding the tub together. Here's another place where your machine might be different, but mine came with just pressure clips that came off with a flathead screwdriver.
Step 15: Now that the clips are off, the tub should come into 2 parts, and you can remove the drum. You may need to take this opportunity to clean off the outside of the drum, depending on how dirty it is.
TIP: The first machine we did this on had some gross corrosion and gunk on the spider arm (the 3 pronged part attached to the tub). This machine was much newer, so the spider arm looks perfect still. We've also been extra vigilant about monthly washer cleaning cycles, so that may have helped, too.
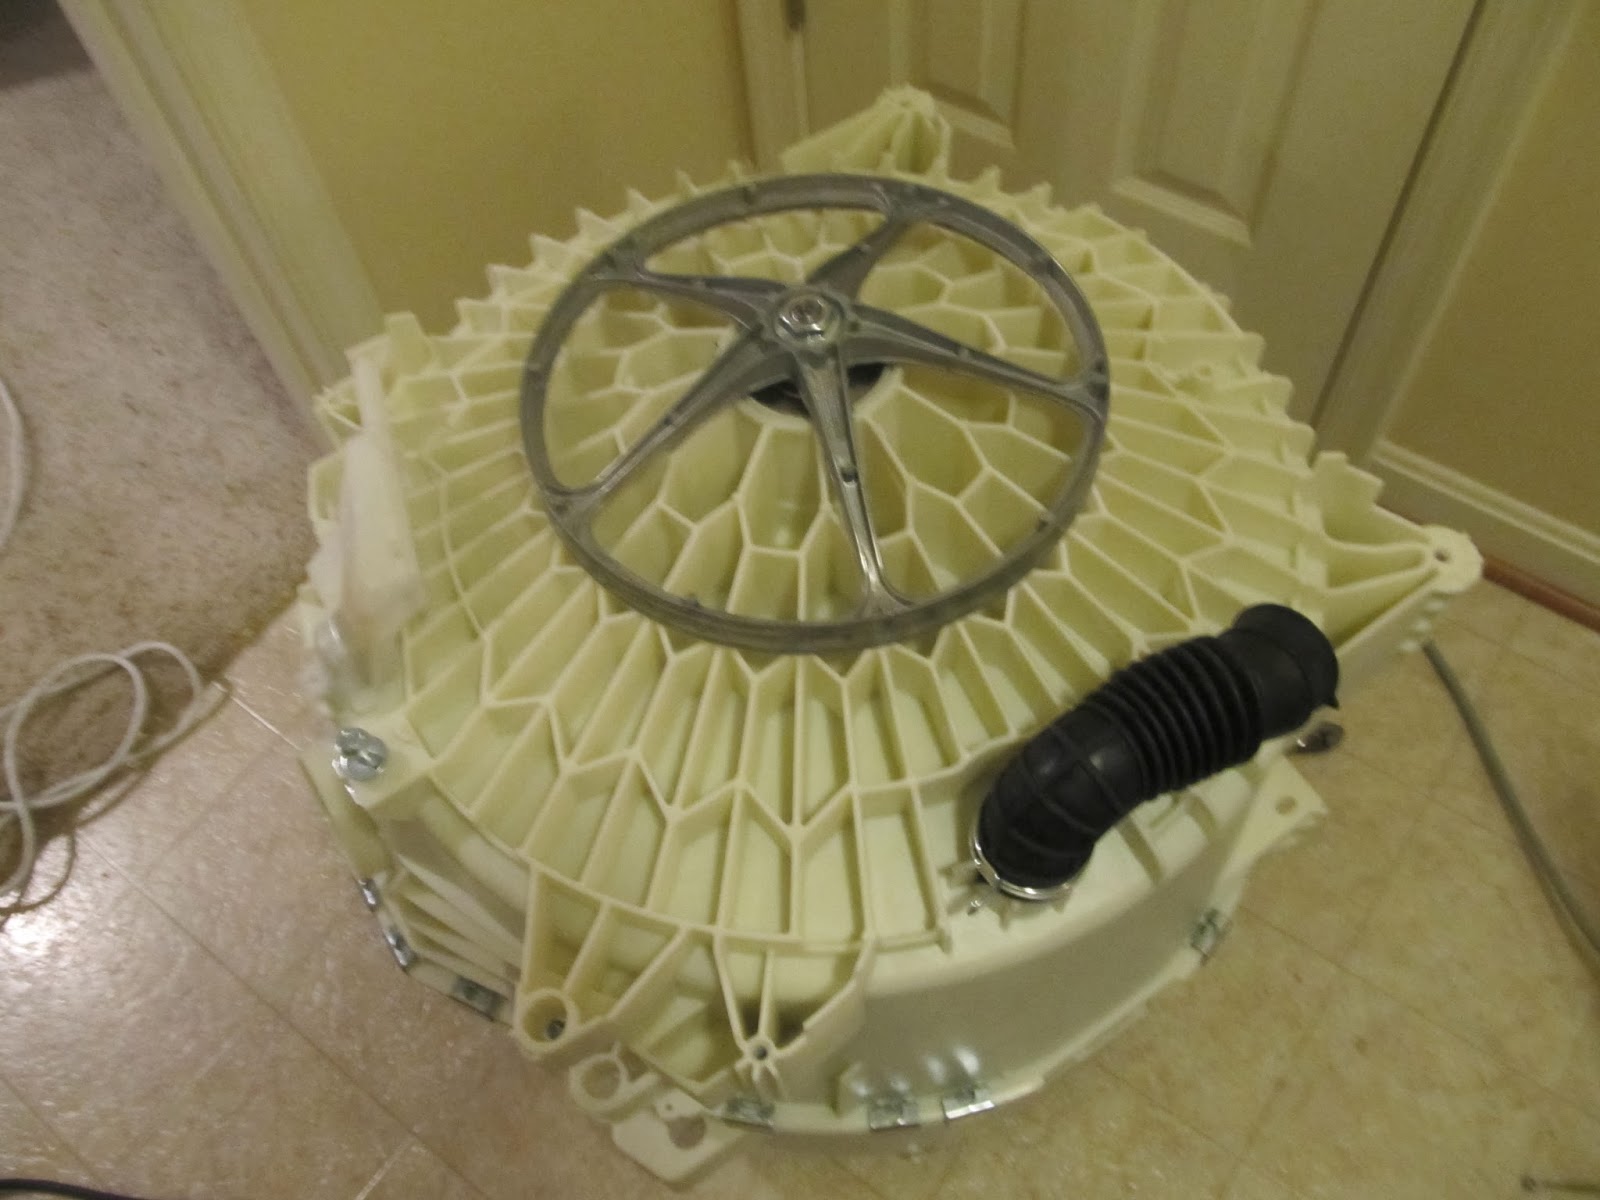
Step 16: Bearing Banging Time. Set your empty tub, out-side down, on top of a couple of scrap bits of 2x4 or thicker wood. This will protect your tub and give the sad bearing a place to fall out. Use your chisel and sledge hammer to knock the rear bearing out. Don't worry about being too delicate on the bearing, but take care not to hurt your tub.
Step 17: Flip the tub over (again, on the wood scraps so you don't break off any clips that will hold the tub together), and give your chisel and hammer a workout, knocking out the second bearing and seal at the same time.
TIP: The first time, we used a fancy seal-removing tool. It was so unbelievably frustrating trying to use that tool, and knocking it out at the same time as the bearing worked just fine.
| Broken bearing; the ring on the top left was supposed to be attached to the bearing... |
Step 18: Now for the tricky bit, installing the new bearings without damaging them. Do the back-side bearing first. Line it up, but it won't just squish in. And you can't just whack it with a hammer, or the bearing will break, and you'll be back where you started. You can only hit on the outside edges, and you want to make sure it goes in evenly, and all the way down into the depth of the hole.
TIP: Save your old bearings to use as buffers between the hammer and new bearing, since they're the perfect size, and you don't have to worry about breaking them.
Step 19: Flip the tub over, and repeat the process with the inside bearing. Clean out any grease that may have gotten on the inside of the tub when replacing the bearings.
Step 20: Install the seal on the inside of the tub using a mallet, in between where the drum will go and the bearing.
TIP: The seal we got wasn't exactly the same shape as the stock part, so we didn't know for sure if we had to inset it or if a flush mount was OK. During our test wash (after everything was put back together), it started squealing at high speed spins.
Then, it started to smell like burning rubber. That was bad. We cancelled the cycle, took everything apart (again), and seated the seal a little deeper and closer to the bearing. We were fortunate to catch the problem before the seal was damaged.
Step 21: Lay the back of the tub over the drum spoke; flip it over and reattach the other half of the tub. When you re-install the clips, start by attaching them on opposite sides of the tub. One tutorial I saw advised running some silicone between the tub halves, but I haven't found that to be necessary.
TIP: Spin the drum when you have it at this stage, before you reattach everything. If it doesn't spin easily, you have a problem (and it's much less time consuming to fix now). We currently have a little seal noise when our drum spins at low speeds, which (so far) seems to be actually sealing out the water, and not doing any harm.
After all that, do a test wash where you watch for leaks (and burning rubber smells) the whole time.
You can do this, but it is hard. This second time around, it took us about 3 hours of work (and then another 2.5 when we had to redo the seal). Good luck, and when this project makes you frustrated, just think of all the things you get to buy with the money you're saving by not buying a brand new washing machine.
*General disclaimer and reminder that I am neither a professional nor an expert at these types of things. These steps might not work for you, and might make everything terrible and the worst. I'll be happy to answer any questions to the best of my ability, but if you tackle this, any fallout is between you and your homeowners' insurance.
Subscribe to:
Posts (Atom)