
 |
| Basically everything you need; and a drill. |
For each bracket, cut a back (wall) piece and a side (bat end) piece.
 |
| Oh, and some of this, plus paint, too. |
Then, divide how long your wood pieces are by the number of bats you're cramming in there, and mark where your centers should roughly be.
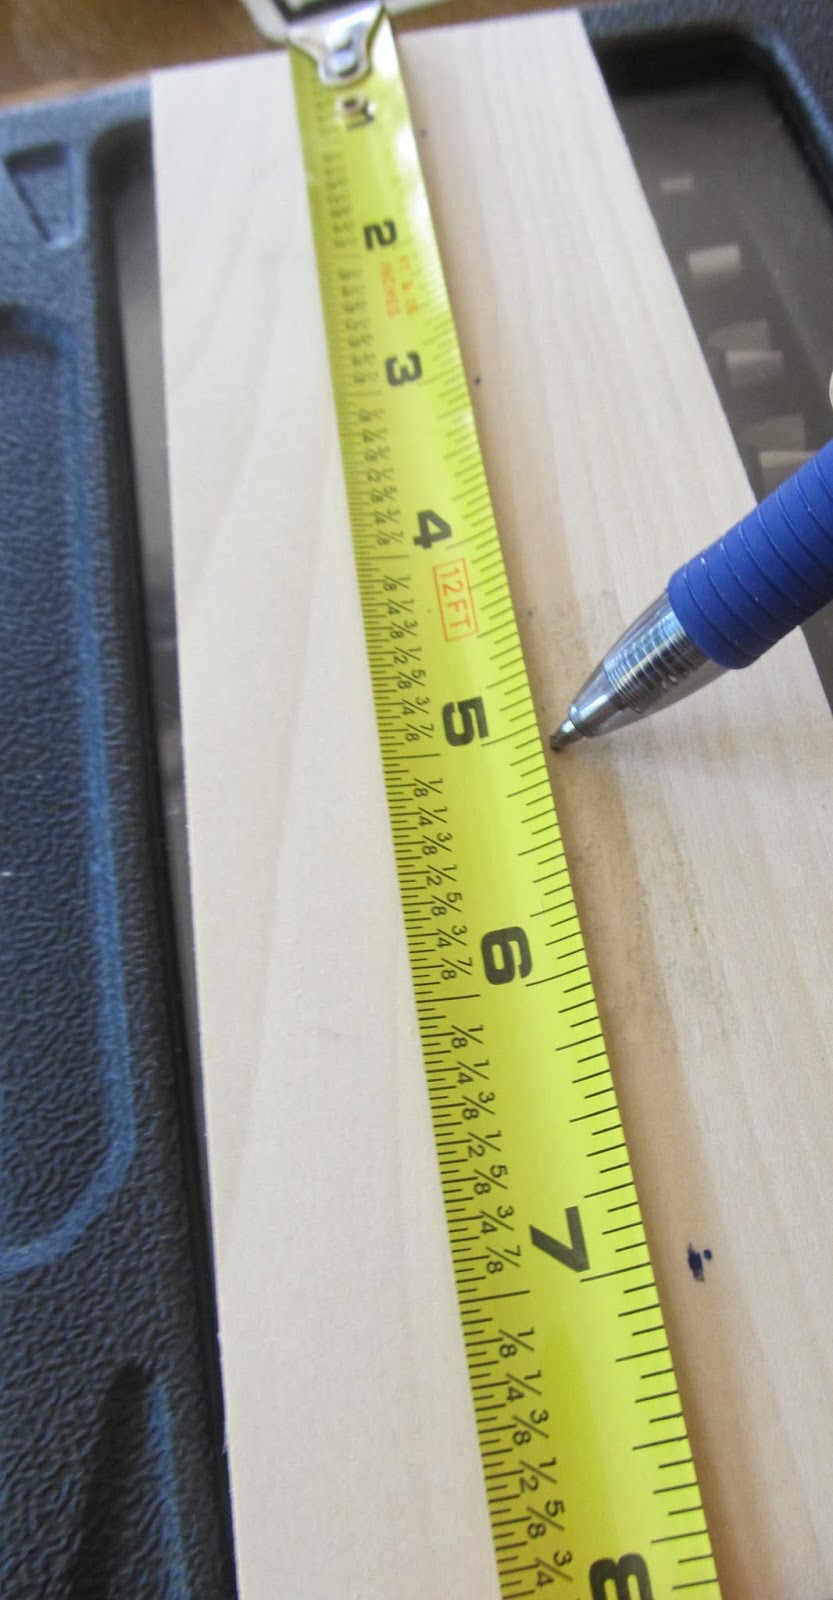 |
| My board was 8 inches long, so I kept 2 inches between bats, with 1 inch from the edges for the first and last bat. |
Then, make sure the centers are the same distance from the back piece.

Next, pick a bit with a head slightly wider than the end of the bat.

 |
| That pokey tip in the middle is perfect to line up on your center marks. |
I abandoned that for a simpler red sharpie mark, and drilled 8 holes.


After cleaning up more wood shavings than you thought possible, you'll end up with this. If you want to make the bats removable, you can cut out a small channel in the holes on one side (it will look more like an urn than a circle) to leave room for the bat to move more freely.

Next, attach your back and side pieces to make your brackets. Tape was enough to hold everything steady while drilling the pilot holes


Screw your pieces together, and you should have something like this.

Now it's time for some fine-tuning. Do your first (of many) test runs with your bats. Make sure everything fits in as evenly as possible.

Because the ends of the bats are rounded slightly, I found it held more securely if I did one more pass with the next bit size down in the already drilled holes.


Then, because our beloved Nationals have a non-standard bat that's just a hair longer and narrower, we made an adjustment to one of the holes on the other side, as well.
 |
| Oddball. |
 |
| Adjusted. |
 |
| All even. |
Now paint/stain/whatever your desired finish, and let it dry. I just used some old trim paint that matches the rest of the house. Then, drill some pilot holes to make actually installing this thing just a little easier.


Now, it's time to install! Pick roughly where you'd like the brackets to go, level one of them and mark your screw locations. I used anchors because I mounted this in a child's bedroom, but it's not so heavy that I think they're really necessary in all cases.
 |
| These are my favorite anchors - they screw right in and you hear a click when the screw activates them. |
 |
| One up, one to go... |
Then, grab a helper to make sure you can get all your bats arranged as you make sure everything is level, mark your spots and repeat the same installation process (making sure the bats are in when you put up the second bracket!).

The verdict, when I showed the kiddo: "Oh. Bats. Yeah. Good." But I caught him ogling them later, so it seems to be a winning solution (at least for now).
No comments:
Post a Comment